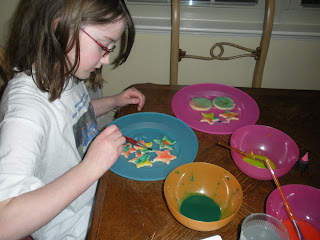
Now, onto the better stuff... Cookie fun with kids!!!!
Last wednesday the girls I babysit and I made sugar cookies and decorated them for my good friends husband who is currently serving overseas in Afghanistan. This was sooo much fun and the girls LOVED it! This recipe is from Pioneer Woman... if you don't know who she is, you should visit her site, shes awesome! This is a great kid-friendly, fun to make recipe!! The sugar cookies taste great, and the kids literally get to paint them, yea I said it, paint them before they bake!! And then get to decorate them with icing!
Ingredients:
Cookies (makes ~36 cookies):
2/3 cup shortening (aka crisco)
3/4 cup sugar
1/2 tsp grate lemon or orange zest (I used lemon)
1/2 tsp vanilla extract
1 whole egg
4 tsp milk
2 cups flour
1.5 tsp baking powder
1/4 tsp salt
Egg Glaze:
1 egg yolk
1 tsp water
2-3 drops food coloring
Icing:
4 cups confectioners sugar (1 lb bag)
1/8 cup milk
1 egg white (optional)
Directions:
1. Cream shortening, sugar, lemon zest, and vanilla throughly together. Add in egg and beat until light and fluffy. Add in the milk and mix.
2. Sift together the dry ingredients, then add it to the creamed mixture. Divide dough in half, slighlt flatten between two sheets of waxed paper, then refrigerate for 1 hour (or freeze for 20 mins).

3. Roll out dough on a well floured surface and then use cookie cutters to cut into desired shapes.
4. Mix together the egg yolk glazes and make all your desired colors.
5. Using a soft paint brush, let the kids decorate all the cookies (before baking)!!!
Making stars for Trey!!
And some smiley faces for the other soldiers!!
6. Bake at 375 for 6 mins. Do not allow the top of cookies to brown. Cool cookies completely.
7. Mix together the icing with a hand held mixer. Place the icing in the ziploc bag, push the icing down to a corner of the bag, and cut off a small amount of the bottom corner of the bag.
8. Decorate and serve!!!
We had a great time and the girls asked me if we could do this every week... probably not going to happen, but next time we can make cupcakes, my fav as everyone knows!!
Happy Baking!!


.JPG)


No comments:
Post a Comment